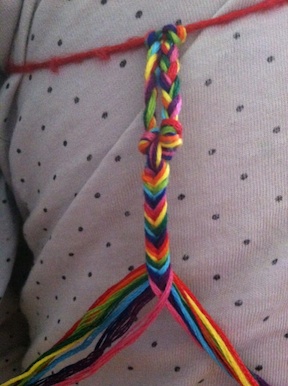
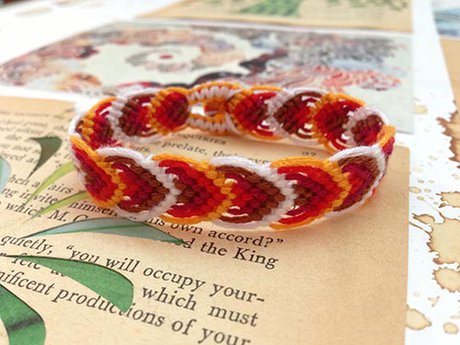
How to make Heart Friendship Bracelets ?
This bracelet is one of my favourites. I used to do these sitting for hours to pass time in summers.
This can be given to your BFFs and spread the feel......
By seeing itself it will attract and surely your friend will say "COOL"
This follows the knots of chevron but looks amazing at the end.
DIFFICULTY : Medium

Now lets see how to make them.
THINGS YOU WILL NEED :
- Embroidery floss or even woollen strings of 2 different colours of your choice.Length - 50 inches or 1.2 m
- Cello tape or pin or clipboard
- A button that suits your bracelet
- A pair of scissors METHOD :
- Cut 4 strings of 2 different colours all about 50 inches. So you have totally 8 strings.
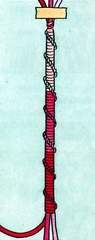
- Combine all the strings and tie them in the middle so that you get a loop.
- Stick / pin / clip them to the suitable surfaces. The outermost string colour
- Separate them into 2 sets. The strings should be in the mirror image pattern.
- Start from the left. Take the first strand and make a forward knot with the second strand. Don't forget to make the knot twice always.
- Continue making the same knot with each strand twice until it reaches the middle.
- Now take the right side's outermost strand. Make backward knots twice with each strand towards left until it reaches the middle.
- Tie a backward knot with the left side consecutive strand twice to connect the two halves. You first row is completed.
- Continue the same steps to finish the second row. These are called normal rows.
- Now we are going to make a special row. Take the 2nd outermost strand and make a backwards knot over the outermost strand. Knot twice.
- Repeat on the other side: take the 2nd to last strand and make a forward knot over the outermost strand. Knot twice.
- Complete the row by taking the 2nd outermost strand and make forward knots over each strand until it reaches the middle.
- Mirror the steps on the other side and connect the middle strands. The heart cleavage has been created and the third row is finished.
- Now repeat this special row again for the 4th row, taking the 2nd outermost strand and reversing the knot over the outermost strand.
- Mirror the step on the other side. This forms the outer edge of the heart. Now fill in the heart by finishing the row with 2nd outermost strand and making forward knots over each strand until it reaches the middle.
- Mirror the steps on the other side and connect the middle strands. Now, it’s back to a normal row again to close the heart. Make forward knots with the outermost strands, moving inwards towards the middle. Connect the middle strands.
- Knot another normal row and then 2 special rows to form another heart. Do you see the pattern? 2 normal, 2 special, 2 normal, 2 special . . . keep going until the bracelet is long enough to fit around the wrist.
- Finish the bracelet with a big knot and trim the ends.
- You can add a button or tie itaccording to the size of your wrist.